Whether you’re simply curious about the mushrooms growing in your back yard, or you desire to wander into the woods for coveted edibles, it can be hard to know where to start with identification. Here are some basics to get you started, have fun!

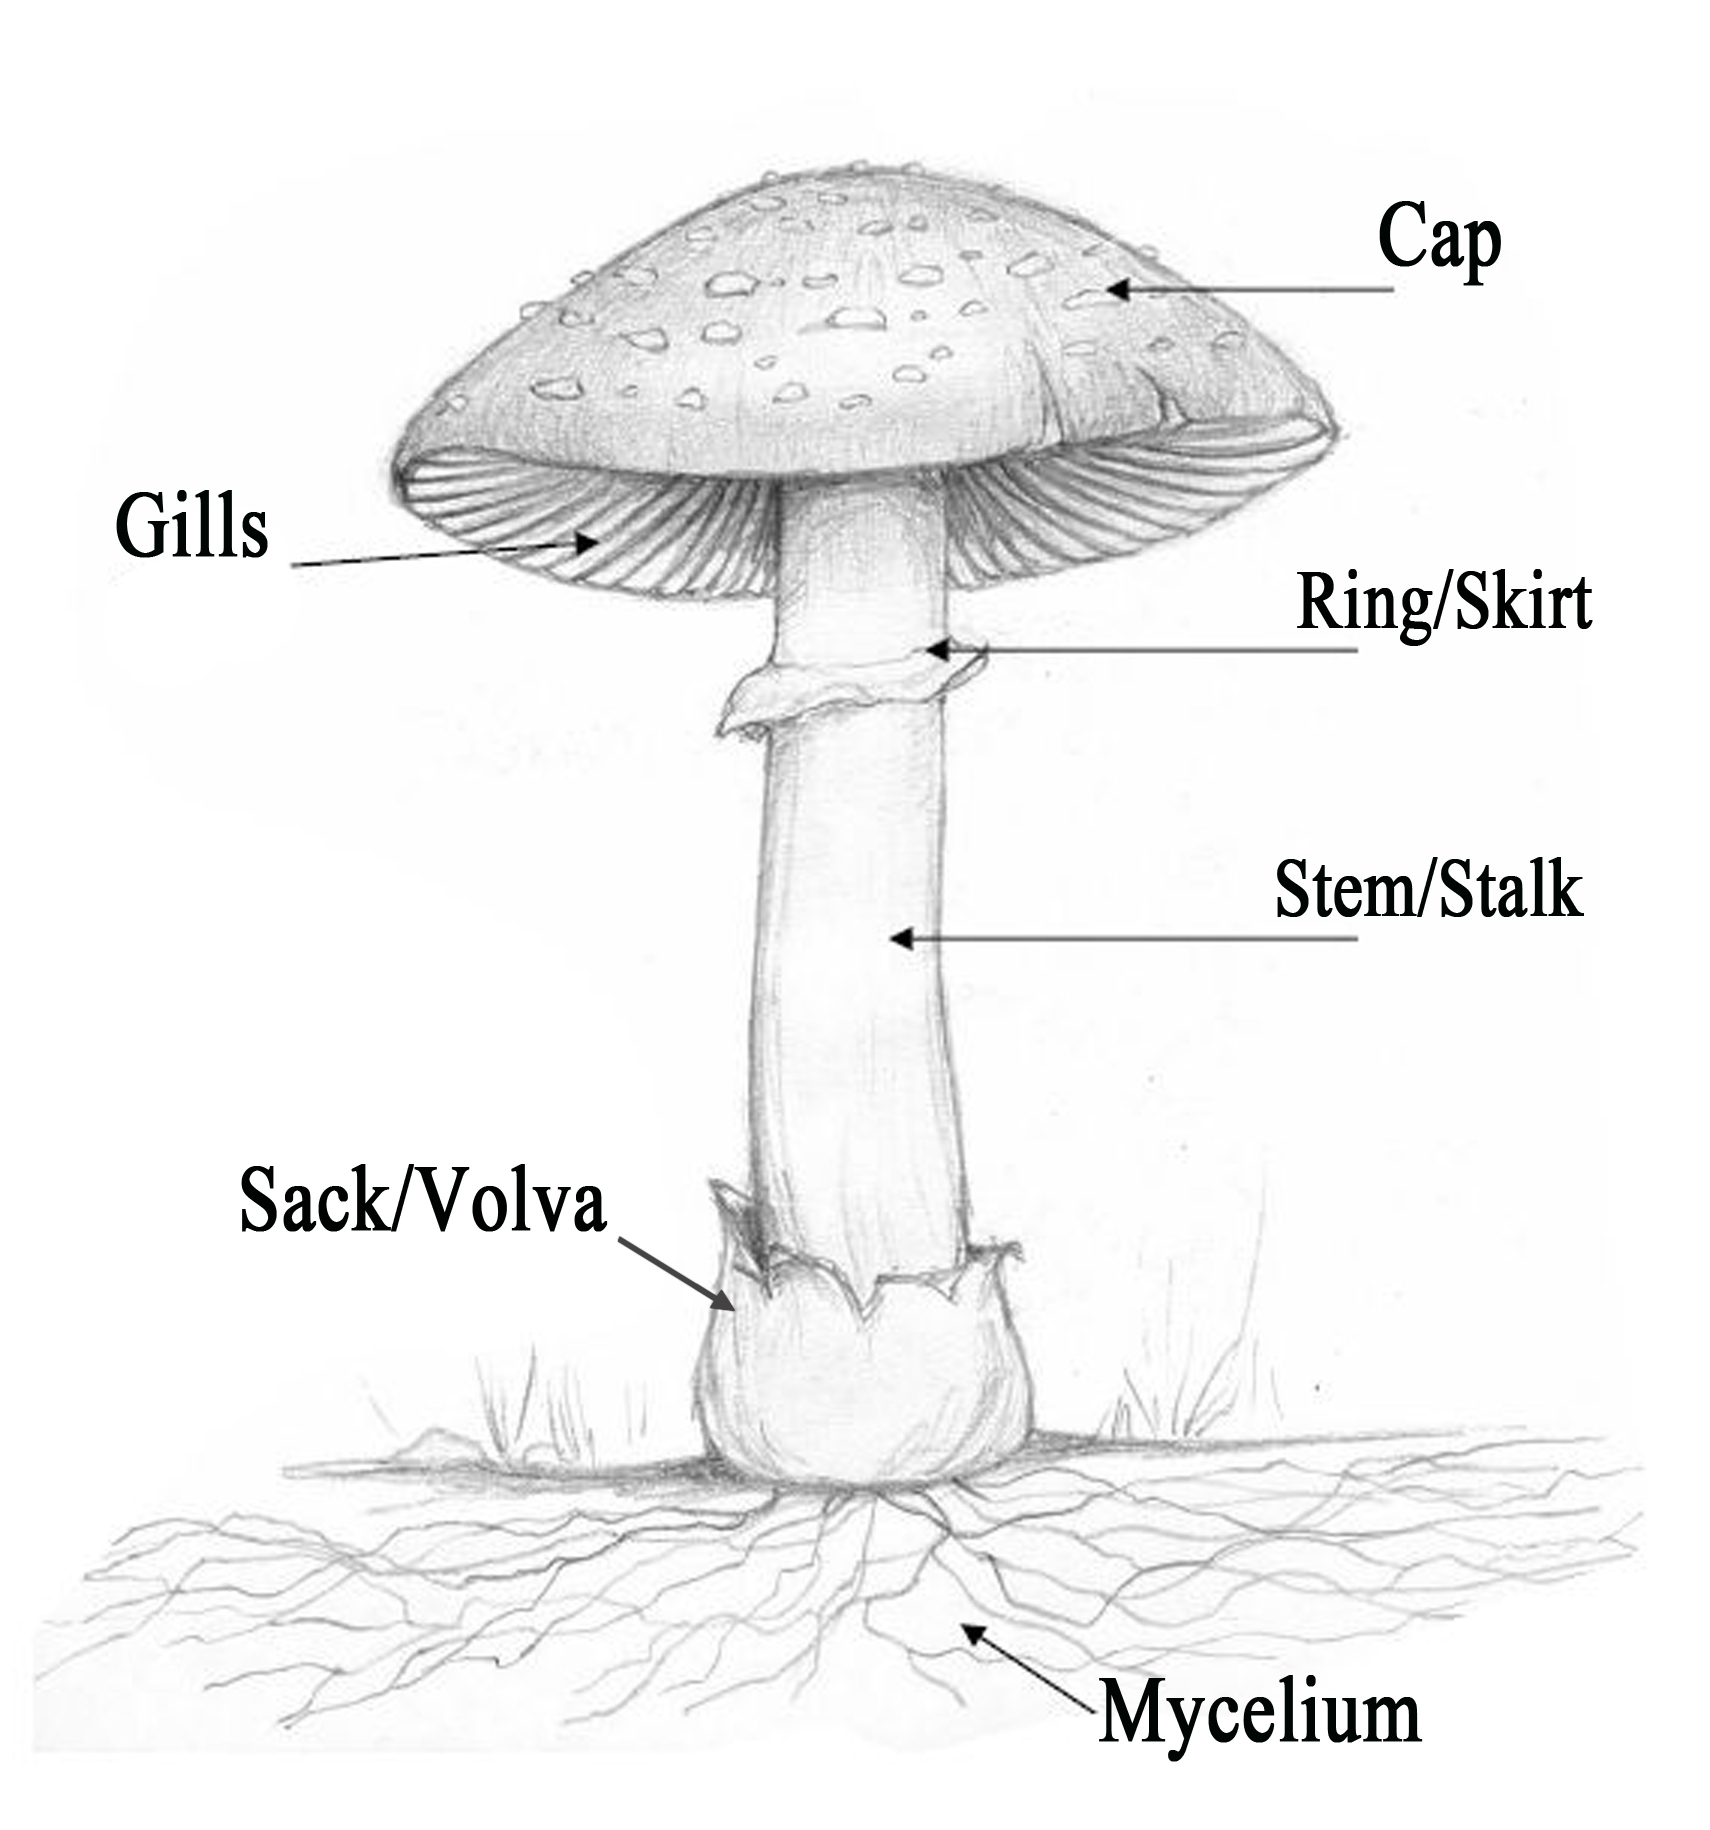
*Sack/Volva: The sack is a remnant of the ‘universal veil’ that once enclosed the entire mushroom. This universal veil encases and protects a baby mushroom, as the mushroom grows, it brakes out of the universal veil and develops into it’s mature form, leaving behind the remnants of it’s sack around it’s stem. Only specific mushrooms have this feature.
*Ring/Skirt: A ring is left over from a ‘partial veil’ that once covered a mushroom’s gills. A partial veil covers the mushroom’s gills to protect them, as the mushroom grows and matures, the veil brakes away revealing the gills and leaving behind tissue on the stem.
Here are some questions to ask as you examine a mushroom:
- Stem/Stalk:
- Color, shape, does it change colors or ooze fluid when broken or pinched?
- Any distinctive odors?
- Is there a ‘ring’ from left over veil tissue on it? Or a sac/volva at the base of the stalk from a universal veil?
- What is the stalk attached to, is it growing from dirt, debris, dead wood, a live tree?
- Cap:
- Color, is it different than the stem?
- Does it have any unique textures, spots, striations or a distinctive shape?
- Any distinctive odors? (Other than ‘dirt’ and ‘mushroomy’)
- Does it bruise, change colors or ooze liquid when pinched or scratched?
- Underside of Cap:
- What does the underside of the cap look like? Gills are most common, but they may also have spines, a spongy pore layer, a hard pore surface…etc
These observations will get you started, but this next step will exponentially fast forward your identification process.
Here are a few variations of what the underside may look like:


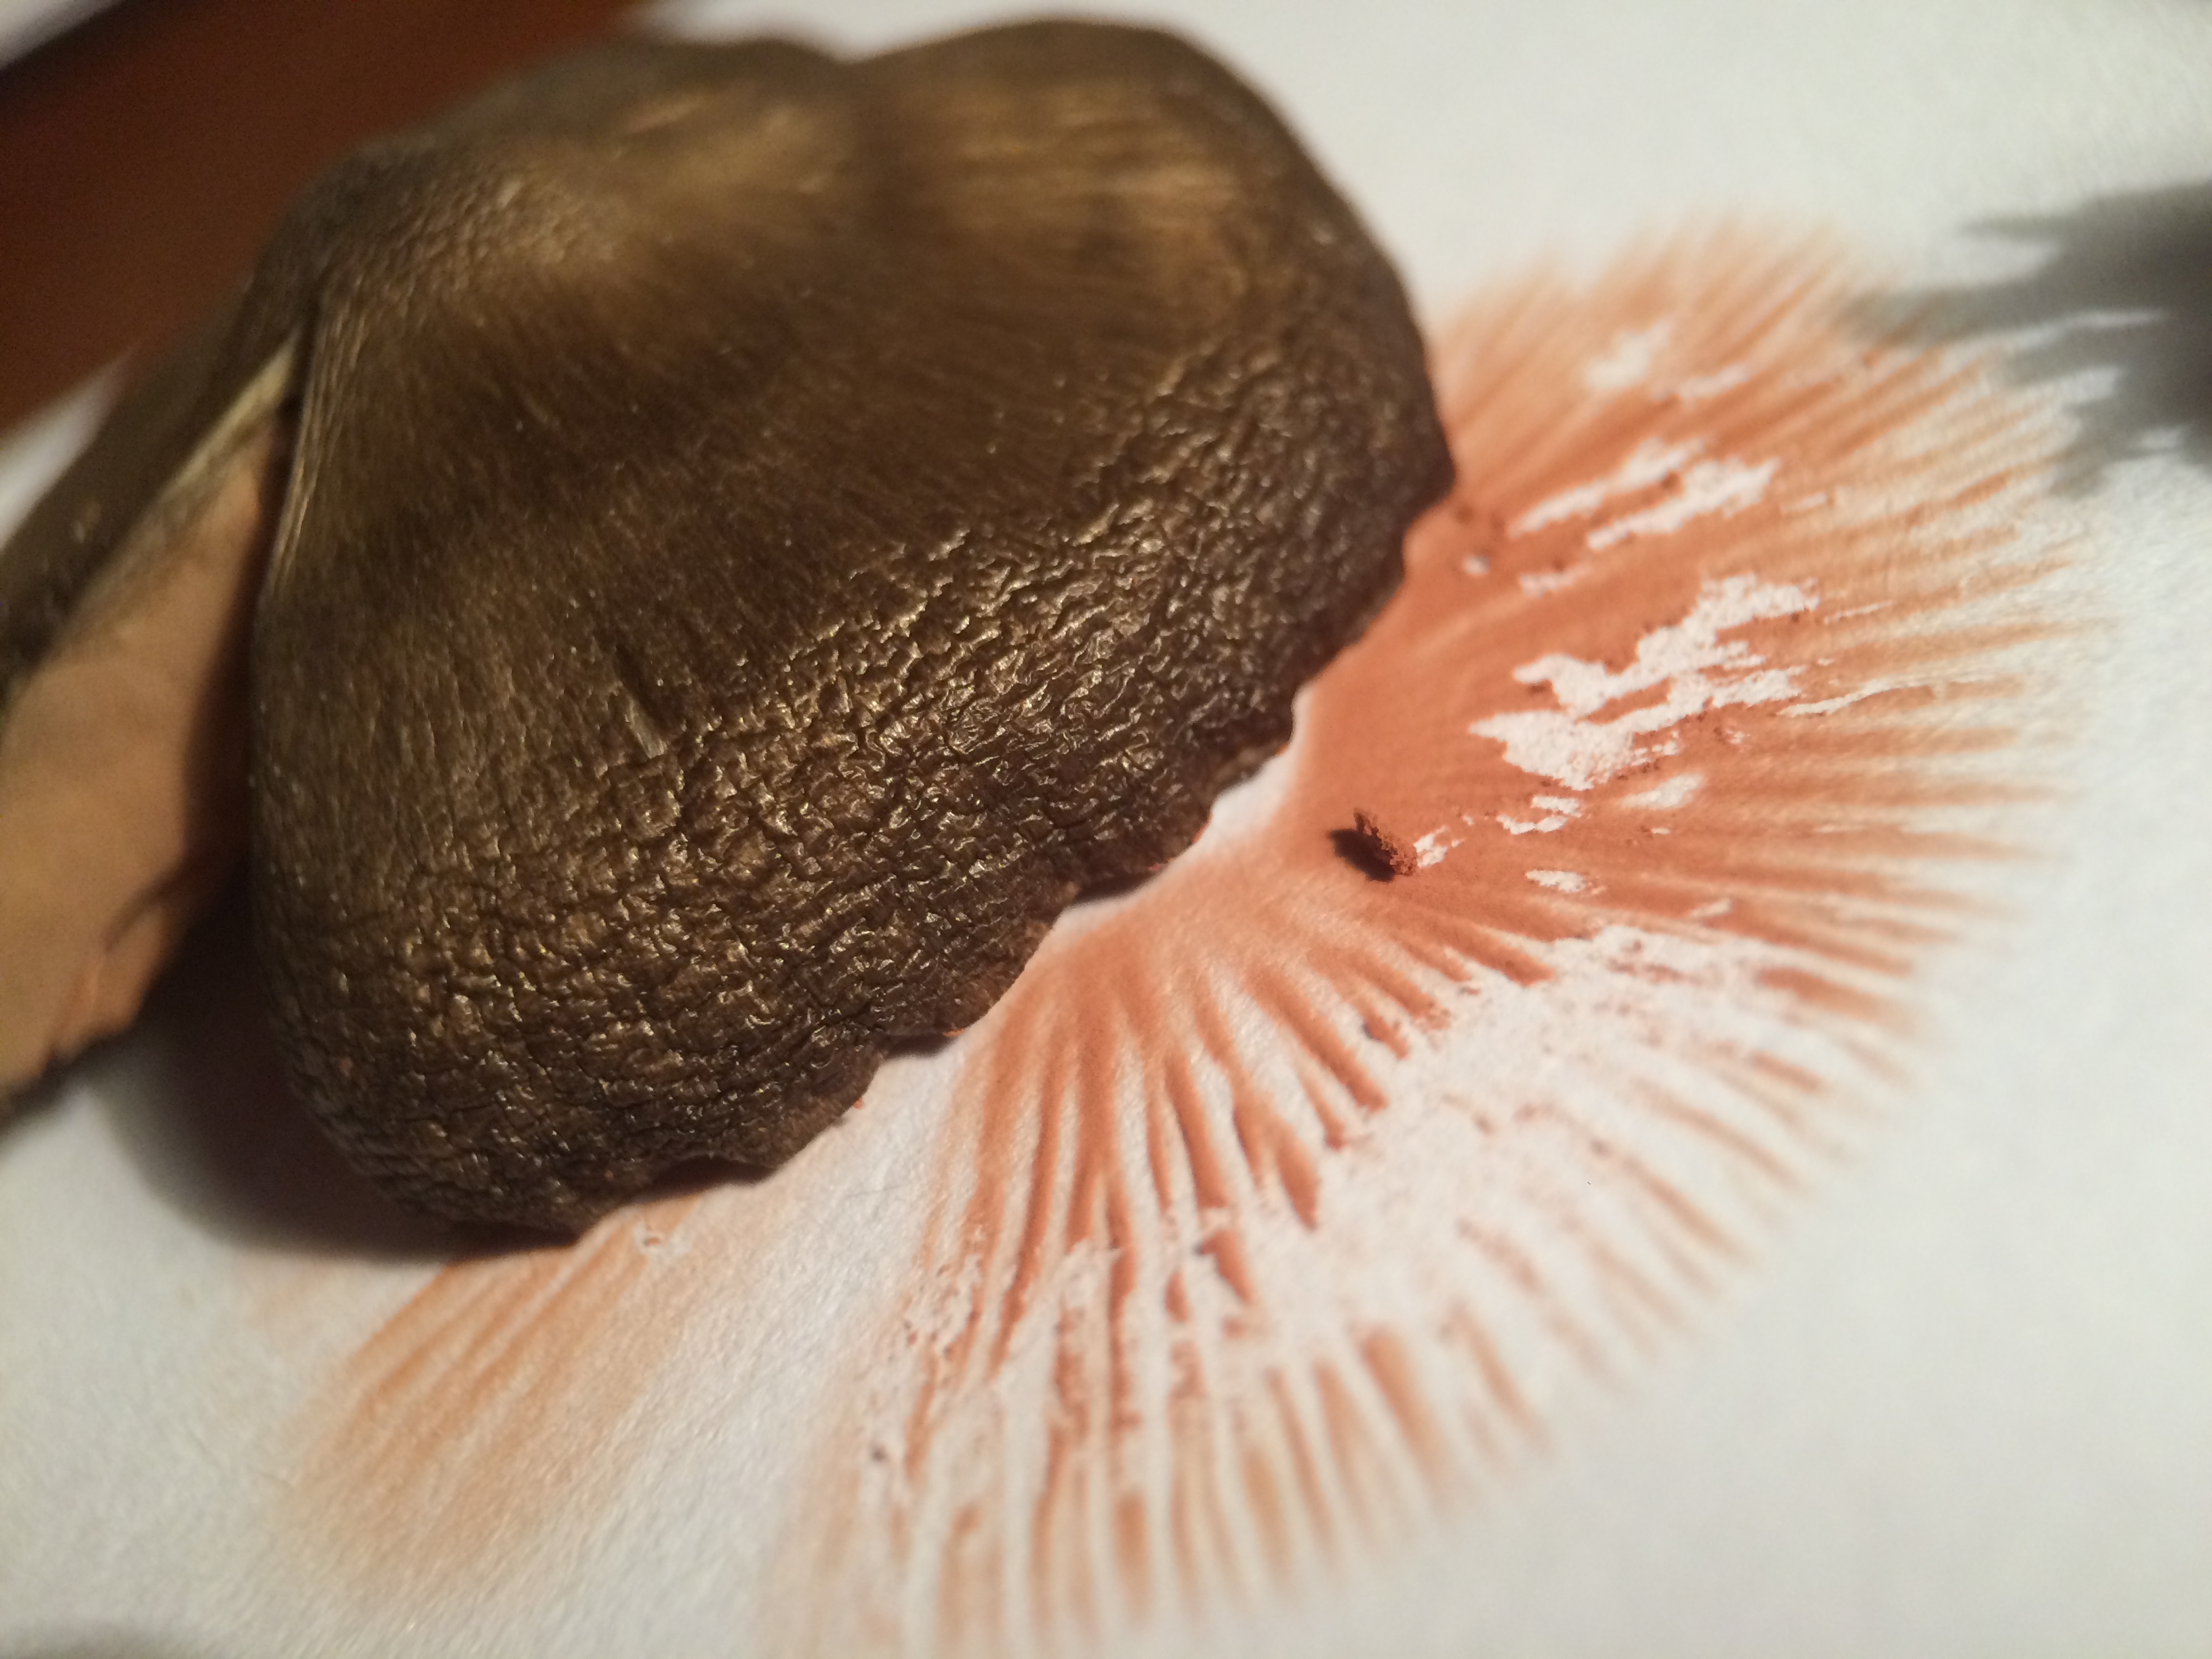
Spore printing:
I love doing this, I feel like I get to collaborate with the mushroom on an art project, here are the ‘need to knows’ about spore printing.
What is a spore print? Collecting a mass of mushroom spores in order to observe the color of them.
Why do we need to know the mushroom’s spore color? Knowing the spore color can make identifying easier and much more accurate. Knowing the spore color is a way to categorize mushrooms in similar fashion to a library separating books by topical category. Spore color can confirm identification of edibles verses poisonous mushrooms.
How to make a spore print:
- Collect fresh mushroom specimens
- Carefully remove cap from the stalk
- Lay cap on a piece of paper with gills (or pores/spines) down
- Place glass bowl over specimen, this prevents the mushroom from drying too fast and safeguards the spores from airflow
- Wait approximately 5-10 hours (sometimes longer if specimen wasn’t mature, or less if was already in the process of releasing it’s spores)
- Remove bowl and mushroom cap from paper, left behind should be a deposit of spores.
What if your spore print didn’t work? Here are a few tips.
- You may need to let the mushroom sit longer, the spores may have not released yet.
- Your spores may be the same color as the paper you used, making them hard to see. This is especially true for white spores on white paper, hold the paper at an angle up to the light to check for the texture of the spore deposit. (To avoid this problem, use foil or glass to make your print on.)
- Make sure your mushrooms aren’t water logged when setting them on paper, let them air dry before trying to print, otherwise the paper will simply become a soggy mess.
There’s nothing that will sharpen your observation skills quite like mushroom identification, with these things in mind, you will be well on your way to identifying proficiently!
But what if your mushroom doesn’t have a cap and stem, or looks more like a sea creature than a mushroom or is just a lumpy bumpy jelly mass growing from a tree? Mother nature sure enjoys marching to the beat of her own drum and the anomalies that are displayed in mushrooms can either frustrate or fascinate. Don’t loose heart, enjoy the oddball mushrooms and over time you will become familiar with more and more species.
The next step will be taking the information you’ve gathered and applying it to an identification field guide!
Once you’re ready to take the leap into purchasing a field guide, do yourself a huge favor and find a local book. For example, I live in Washington State, and my go-to book is “Mushrooms of the Pacific Northwest” by Steve Trudell and Joe Ammirati. Buying a universal field guide will have many species not native to your area that you’ll have to filter through making the identification process much longer than necessary.
My Best And Final Piece Of Advise As You Get Started:
Choose one mushroom to identify first, then build from there. Don’t overwhelm yourself by trying to learn an entire forest of mushrooms as you get started! You will not always succeed in identifying-but do not base your success off how many mushrooms you correctly ID, but rather what you learn in the process.

Do not consume wild mushrooms unless they have been correctly identified as safe for consumption. The tips listed here are merely guidelines to begin the identification process, not a source for exact identification.
